

The basement hallway refresh
- Hello Ember

- Dec 9, 2020
- 4 min read
When we bought our new house, the basement hallway was... less than ideal. The walls were coated with wood paneling, the ceiling was covered in tiles, the lights hung too low, and the dark doors weren't doing the space any favors. Although this was a small space, it was a big project.
Here's a blurry phone photo of the before (I should have taken more pictures of this project, but since we started unexpectedly and right away, I didn't think much of it)

This project was pretty low on the priority list...originally. Drew decided to rip away a chunk of the wood paneling on day two of moving in, so it jumped up the list pretty fast...
We got the wood paneling off the walls- it was held on with a combination of nails and glue, some areas were glued on very well. Unfortunately, the wood paneling wasn't on top of neat and tidy drywall. It was covering semi-finished drywall sheets that weren't seamed or painted or textured.
*special shout out to my brother that helped make quick work of this after a day of helping us move things to the new place

Next, the ceiling tiles needed to come down. These were also just covering semi- finished drywall. Once these came down, the glue spots under them needed to be removed. Drew used acetone to get them down before the contractor came in to do the rest of the work.

We hired a local contractor to mud the drywall. (Neither of us have experience with drywall, and this size of a project is not the place to start) It took a few weeks for the contractor to mud the space and smooth it out. Here's an in-progress shot:

We went with this option instead of having him install new drywall because it was cost-effective and would save time. This was ideal because it's just a hallway and not a main living space- best to save time and money on it because of the other projects that need to get done.
Once the contractor was done with the mudding, I headed to the store to buy paint and primer. Generally, I'd go with a "paint+primer" but I was specifically told not to do that on this. The mud needed an actual primer to help seal it properly. So, I bought Valspar's drywall primer and primed everything. Walls, Ceiling, door fronts- it all got primed.
I loathe painting ceilings, so priming it and painting it was not something I wanted to do, but I did it anyway because it was the right thing to do.
For the ceiling paint color I went with Behr Frost (a shade of white) and I used Behr Loft Space for the walls (a light blue-grey) which is also the neutral we're using throughout the house.
The hallway was already looking ten times better than it did before, but there were a lot of finishing touches left to do.
I wanted to paint the doors. Originally, I wanted to paint all four of them a different color in a palette that played well together, but Drew was not a fan of this. He thought it was fine to leave them the dark wood color, but I found a compromise... I'd paint them all one color to add some interest while still updating them. I chose a teal color (Behr Thai Teal) because it was cheerful and bright, and might also be my favorite color.
Painting the doors seemed a safer option instead of painting the whole hallway a bold color for a few reasons: 1) It contained the color to smaller pops 2) the hallway is visible from the green living room and I didn't want them competing 3) we had just paid for the hallway walls to be refinished and I didn't want to risk anything on the walls and 4) I had never painted doors any color other than white and a hallway seemed like a good place to test it, especially with old doors that might be replaced in the future.
I only painted the front side of the doors after I primed them (I didn't want to impose the color on each of the rooms) but I think it made a fun impact on a smaller space. It took a few coats to cover them properly because of the age of the wood and the shade of teal.
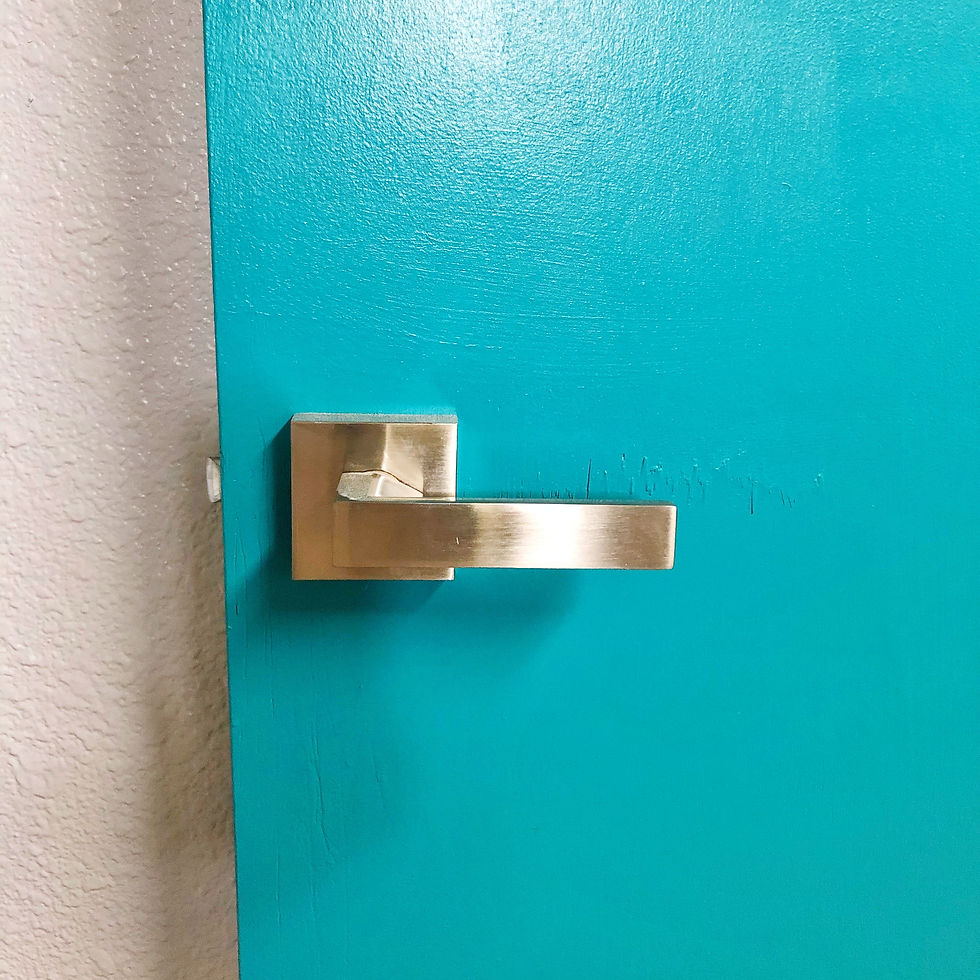
I also replaced the door handles with updated ones. The ones that were in place were dated, gold, and mismatched. These rooms didn't need to lock so I used these modern looking ones that I bought off Amazon.

The lights needed to be replaced. The two in that hallway hung down quite a bit, which was particularly problematic as you go down the stairs because, well, we're tall people. They were also older lights and weren't matching.
We had the electrician quote what it would be to put in recessed can lighting in the space, but the electrician suggested another more cost-effective solution instead - finding some mock-can lighting and replacing them ourselves.
We bought a few options before landing on the right solution. The right one still required Drew to take out the old boxes and re-drywall the spaces around it. This process took a few weeks to work around work schedules and trial and error. Hindsight might say that should have been done first, but it would have meant the new lights were in risk of being mudded, so it worked out just fine.
Trim and Door casing were the final steps of this refresh. The door casing was a new process, but pretty straight forward. Drew had done so much trim work in our old house that it was the least daunting part of this whole project, but still required quite a bit of measuring and time.
And it is finished! The project, in total, took about three months and was a pretty good hybrid of contractor work + DIY, but it turned out pretty well.
Honestly, anything we did would be an upgrade from the dark wood paneled hallway, but I'm very happy with where it ended up. I'm still debating about what decor and wall hangings can go in the space, and we should install the hand railing, but that's lower on the to-do list.


Comments